A traditional Roman micro-mosaic begins not with a mosaic at all, but with glassmaking: opaque enamel is pulled into threads finer than a millimeter, cut into microscopic cubes, and then set one by one into a slow-drying putty of linseed oil and slaked lime. That putty, known as Roman stucco, is the defining material of the technique, and it is what separates the historic Roman craft from ordinary mosaics assembled with wet cement or from modern craft versions bonded with synthetic glues. Understanding these two material traditions—the spun glass threads called filati and the specialized stucco that receives them—explains both the painterly refinement of the finest pieces and why the technique could not simply be improvised.
Crafting the Microscopic: Smalti Filati and Tesserae
The raw material of the micro-mosaic is smalto, an opaque vitreous glass or enamel produced in a multitude of colors. According to the Antique Jewelry University, the smalto is pulled into rods or threads—called filati, or spun enamel—and left to cool. Only after cooling is it cut into hundreds of minute cubes, the individual tesserae, which are then arranged on a copper or gold tray to form a scene, portrait, or landscape. During the mid-nineteenth century, black Belgian marble, or "Noir Belge," was also carved out and used as a background or base.
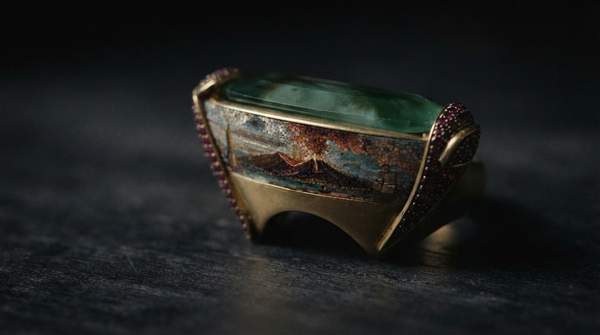
The scale is what makes the material preparation inseparable from the art. Rebecca Di Filippo, an enamelist who has documented the Roman technique, notes that the tesserae can be less than one millimeter in size, making the final image look like a painting. This is the central paradox of the micro-mosaic: the piece succeeds precisely when its construction disappears. At a distance, a well-made micro-mosaic reads as a continuous painted surface; only close inspection reveals that the "paint" is thousands of discrete fragments of colored glass, each cut and placed by hand.
That painterly effect is a direct consequence of the bespoke material. Because the artist pulls the filati from smalto in the colors the design requires, the palette is not limited to whatever tiles happen to be commercially available—the glass itself is made to order for the image. This stands in contrast to modern mosaic work, which typically begins with pre-made, larger tiles. In the traditional Roman method, material creation and image creation are two halves of a single process, and the threads must be spun, cooled, and cut before a single tessera can be laid.
The cutting and placement then demand their own precision. A general survey of traditional micro-mosaic creation describes the working sequence as design planning with detailed sketches and color planning, preparation of the metal backing, selection and cutting of individual tesserae, arrangement of the layout before final placement, application of the binding agent, precise positioning of each piece, and finishing work with polishing compounds and protective coatings. The tools are correspondingly minute: fine tweezers, cutting implements, and magnifying equipment. A single piece, the same account notes, might contain thousands of individual tesserae, each requiring precise placement—a scale of labor that explains why the process is described as one that cannot be rushed.
It is worth noting that accounts of traditional practice differ on the binding agent itself. The general survey lists a traditional mixture of beeswax, resin, and other binding agents among the materials, while the enamelist's account of the Roman technique centers the linseed-oil-and-lime stucco described below. These need not be read as contradictory so much as evidence that "traditional" covered more than one workshop practice; the stucco, however, is the material most specifically tied to the Roman micromosaic as a distinct technique.